Installing an Electrochromatic Mirror.
This was truly easy to install:
1 - Remove your old mirror - use a small flat screwdriver to GENTLY pry the
mirror away from the glass as you slide it upwards - it may take a few minutes -
DON'T FORCE IT!
2 - Route the wiring harness above the headliner, down the driver side forward
pillar to the emergency brake release lever, then run it up under the dash,
coiling it and securing it to the dash support struts using zip ties. Pull
out enough of the white lead (the reverse override signal) and green wire
(thermometer sensor connection) to work with.
3 - Make a small horizontal incision in the firewall pass-through cover (just
above the brake pedal mount against the firewall) on the inside of the firewall.
4 - Make a small vertical incision in the firewall pass-through cover (just to
the left of the Vacuum booster) on the engine side of the firewall.
5 - Route your thermostat sensor along the driver side front fender, then down
under the cross member that the upper radiator mount attaches to (basically,
behind the headlight) to just behind the driving light where the bumper meets
the lower bumper skirt (if you don't have driving lights, it's at the bottom of
the chrome bumper, just in front of your oil filter). Make sure your
wiring harness is well away from the oil lines. Clip it to the bumper
horizontally.
6 - Run the other end of the wiring harness through both incisions in the
firewall pass-through cover. If you can see light from the engine
compartment when you look in from the passenger compartment, get some sealant
and seal the incisions.
7 - Attach the temperature sensor to the wiring harness under the dash, then
stow the excess and secure it with zip ties.
8 - Remove the driver side rear taillight assembly.
9 - Remove the reverse light and find the hot lead (not the ground!) - it should
have a white stripe. Using a piggyback, splice into that lead. If
you find the ground - the auto-shut off will not work if you burn out your
reverse light.
10 - Using a small phillips screwdriver - widen the hole on the rubber gasket
that runs the wires through the fender.
11 - Open the rear climate control cover from the rear of the truck.
Inside, up and to the rear you will see a rubberized panel that is held on by
clips. Remove the upper corner closest to you.
12 - Route an extension wire through the rubber gasket, through the panel, and
under the interior panel. Replace the grommet, panel and taillight
assembly.
13 - Route the extension wire below the interior trim panel (just press the
carpet down and there will be enough room to push the extension wire under the
panel).
14 - Route the extension wire along the floor past both doors, and up the driver
side kick panel to the bottom of the dash.
15 - Connect the extension wire to the white reverse lead of the mirror wiring
harness.
16 - Mount the ground to a metal area under the dash.
17 - Mount the hot lead to a power source (see 'Mounting an Auxiliary fuse
box').
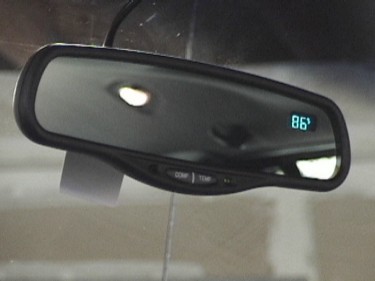
18 - Mount the mirror to the windshield.
19 - Connect the other end of the wiring harness to the mirror.
20 - Follow the manufacturers instructions on calibrating the compass.