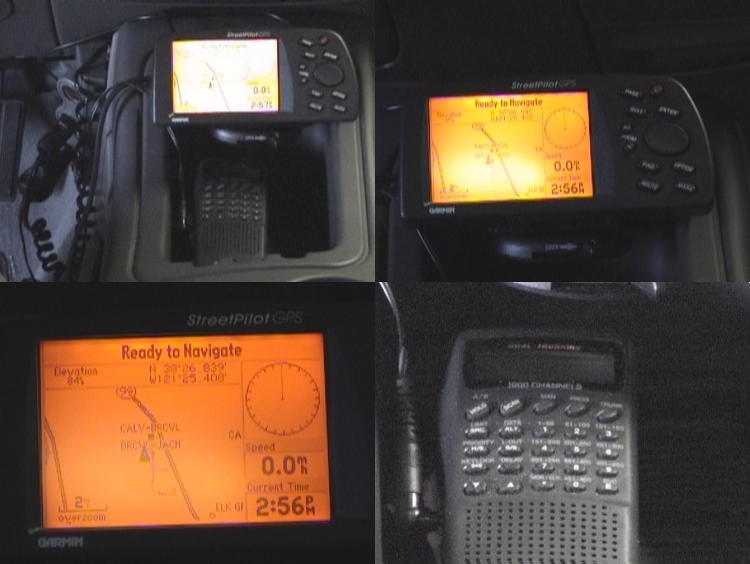
Installing the GPS/Scanner.
The Garmin Street Pilot was the obvious choice for use in my Expedition. It
features:
12 Channel Reception
Built-in Basemap
20 Routes with 30 Waypoints each
100 Stand-alone Waypoints
Uploadable maps from MapSource CD's
16hr Battery Life (6 AA's)
1.2lbs
IPX7 Waterproof Standard (Submerged to 1 meter for 30
minutes)
2.4 x 3.5 Display size
475 Tracklog points (the number of 'breadcrumbs' it can
remember)
Multi-Level Brightness (some units only have on vs. off)
External Ant. Hookup (key for any large vehicle, especially
SUV's
Speed alarm
Price - $636 (retail, your local Fry's may have it for much
less - mine was $450)
Keep in mind that you need to tailor your GPS to your use. A hand held GPS is
convenient for hiking, but most likely will not have a basemap included, or have
a backlight for night driving. While this unit is designed for a car, it is more
than capable of use for hiking. That being said, I wouldn’t suggest this to
anyone who wants it more for hiking than driving – only experienced hikers
with extensive map knowledge (my Military map reading skills are perfect) would
feel comfortable with this unit.
Some people have asked me why I didn’t get the Street Pilot III Colormap
instead. It has many of the same abilities, but here are the drawbacks:
Same 12 channels, but 500 waypoints instead of 100. I’ve
never come close to using all 100 waypoints, and I’ve driven 1000 mile days
quite often on vacation.
50 Routes with automatically calculated turns. Ever
drive to South Lake Tahoe? The unit would mark every hairpin turn and loss of
signal (yes, you can lose a signal on Rt. 50 to Tahoe).
16 Color LCD, but only 1.8 x 3.4 Display size, and only 2 brightness levels Hard
to read at night traveling at 75mph through the desert on Interstate 10.
Voice prompt alarms My radar detector talks enough as it
is, imagine the uproar when you miss your turn while speeding!
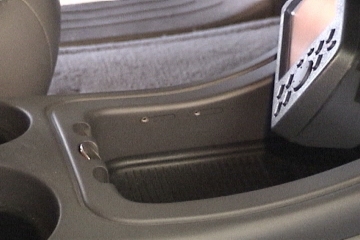
The install of the GPS was actually VERY easy - I mounted mine in the pocket of
the console, but attached to the forward vertical edge, so I can still put odds
and ends in the pocket. Having said that - don't even bother until you get
a remote antennae. Without it, your GPS won't work a good 50% of the time
if it's located in the console. Once you get the antennae:
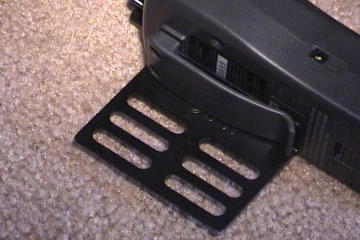
1 - Purchase a bracket kit from Radio Shack (they have a bag of assorted
brackets back by the car stereo kits).
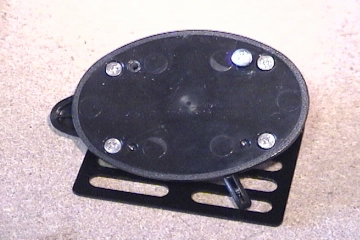
2 - Mount the GPS swivel/quick disconnect mount to an angle bracket from the
kit. (Use the small detents on the bottom of the GPS
swivel/quick disconnect mount as screw holes.)
3 - In the center of the console pocket, align the unit and mark 2 screw holes
at least 3/4" below the lip.
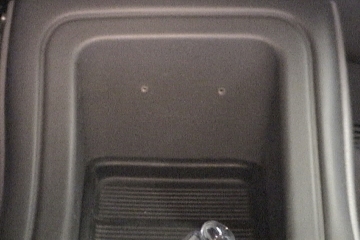
4 - Drill and mount the bracket to the console pocket.

5 - Run the power cord to your power source (see 'Mounting an Auxiliary Fuse
Box')
6 - Run the antennae cord from the center of the dash low on the window, all the
way down the driver side door, under the dash and to the console. Stow any
excess under the dash with zip ties.
7 - Mount the antennae to the window plate and mount it to the window using the
suction cups. (I advise against using the magnet and mounting it outside
the vehicle - teenagers love to try to steal it)
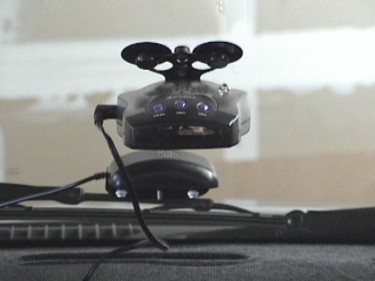
8 - Connect the antennae and power cords and you are done!
The scanner was a late addition...I use it strictly for entertainment
purposes. Again, the install is very easy, but don't try it until you get
an external antennae. Once you do:
1 - Use another bracket from the kit you purchased at Radio Shack (use the same
size you used for the GPS).

2 - Mark the mount points on the inside driver side of the console pocket.
3 - Drill the holes and pre-die them by screwing the mount screws in. Make
sure they are short enough that they don't hit the driver side of the console.
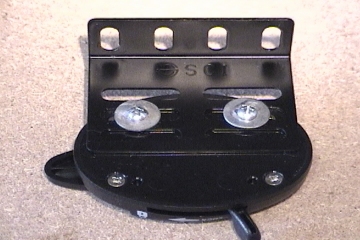
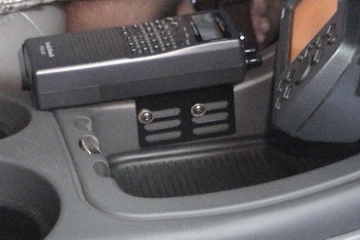
4 - Remove the belt clip screws from the scanner, and place the long end of the
bracket between the belt clip and the scanner housing:

and replace the belt clip screws:
5 - Remove the mounting bracket screws from the console and mount the scanner.
6 - On the rear driver side window (the one in the cargo area), pull the
interior trim back part way (open the rear driver side door, fold the seat down,
and pull the door seal away from the fender - the trim will already have about a
1/2" clearance).
7 - Reach in the trim FROM THE FRONT SIDE and rout the mounting box for your
antennae (I used a window mount antennae so I wouldn't have to drill any holes -
it's held on perfectly).
8 - Climb in the back and mount the box as far up and FORWARD as you can, away
from the solid black border, and use the double-sided tape to mount the box to
the window. (BE CAREFUL, ONCE THE BOX IS ON THE WINDOW, IT IS VERY
HARD TO REMOVE! - GET THE POSITION RIGHT THE FIRST TIME!)
9 - Route the antennae cable down the rear of the back door frame, under the
plastic panel that protects the rocker panel, and to the driver side seat belt
mount, then route the wire under the driver seat. Replace the interior
trim panel and door seal.
10 - Grab the business end of the cable, and route it under the console, up the
front of it and then back to the antennae port of the scanner. Coil the
excess under the driver seat and secure it using zip ties. (MAKE
SURE THAT THE SEAT HAS FULL TRAVEL WITHOUT BINDING THE ANTENNAE WIRE OR
STRETCHING IT! IF YOU HAVE POWER SEATS, MOVE THE SEAT TO ALL EXTREMES OF
MOTION [FORWARD AND UP, FORWARD AND DOWN, REAR AND UP, REAR AND DOWN, FORWARD
TILT UP AND DOWN AND REAR TILT UP AND DOWN] TO ENSURE THAT YOU DON'T CUT THE
ANTENNAE WIRE)
11 - Mount the outer antennae directly over the inner box.
12 - Route the power wires along the antennae wire until you get to the under
-side of the driver side dash - then run it under the dash to the power source
(again, see 'Mounting an auxiliary fuse box').
It works quite well along with the Cobra 9 band Radar/Laser detector. I
picked the cobra for the following qualities:
360 degree VG2 Laser detection Completely useless since
Laser can acquire in less than one second, but if you are a law abiding citizen
like myself, it's fun for the entertainment value.
VG2 Undetectable I did say I was law abiding, right?
Safety Alert Need I say more? In participating jurisdictions
that use the Safety Alert/Strobe Alert system, you will be warned of emergency
vehicles (Ambulance, Fire, Police, Construction, etc.) as they approach, letting
you know to get the hell out of the way!. It also warns of commuter trains/light
rail transportation (where available). It's a must-have safety feature!
Voice Alert Annoying at first, but nice since you
don’t need to strain to read what alert is sounding
Auto Mute Prevents the detector from becoming annoying
City/Hwy switch, Dim switch, System Status prompt and Memory
I like to call this little package of electronics my ECM (Electronic
Counter-Measures). They keep me apprised of my surroundings enough to keep off
of the radar screens of most police while keeping me safe, so they were worth
every penny!
